How to Make Paper Book Covers for Self-Publishing
Learn how to make paper book covers for KDP. This guide covers print templates, dimensions, and adapting your digital design for a professional paperback.
Posted by
Related reading
How to Write an Ebook in 2026: A Step-by-Step Guide
Learn how to write an ebook that sells. Our practical guide covers topic validation, drafting, editing, formatting, cover design, and launching on KDP.
Children Book Illustration: From Concept to KDP
Learn the essentials of children book illustration in our complete guide for indie authors. Covers styles, hiring illustrators, budgets, and KDP print specs.
The Bright Pink Color Code for KDP Book Covers
Find the right bright pink color code for your book cover. This guide covers hex, RGB, and CMYK values, plus KDP print settings and design tips for authors.
Ready to design your cover?
Use our AI book cover generator to create tailored book cover concepts in minutes.


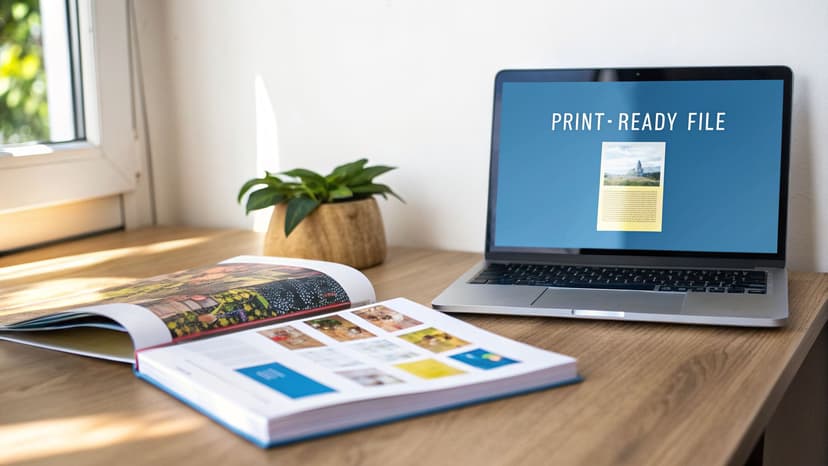
You've got a great ebook cover, perhaps one you created with an AI tool. You're ready to publish your paperback. Can you just upload that same file to a print-on-demand service like Amazon KDP and call it a day?
Not so fast. This is one of the most common—and frustrating—mistakes new authors make, and it will get your file rejected instantly.
A digital cover is just the front. A print cover is a completely different beast, requiring a specific file that accounts for the physical dimensions of your book.
Before you build that wraparound file, calculate the final dimensions with the KDP Cover Size Calculator so your template matches your exact trim size and page count.
From Digital Design to Physical Book
To get your book into the hands of paperback and hardcover readers, you need to transform your front cover design into a physical, print-ready file. Print-on-demand (POD) services like Amazon KDP require a full wrap-around file that combines three distinct elements into one seamless image:
- The Front Cover: Your existing artwork.
- The Spine: The book's edge. Its width is critical and changes based on your final page count and paper type.
- The Back Cover: Where your blurb, author bio, and the all-important ISBN barcode will live.
As you move from screen to paper, thinking about the tangible product is key. The right paper quality and binding types for physical books will massively influence your cover's final dimensions and professional feel.
Key Technical Concepts for Print
Before downloading a template, you need to grasp two non-negotiable technical details. Getting these wrong is the source of most printing headaches.
First is the color model. Your computer screen creates color using light with the RGB (Red, Green, Blue) model. Printers, on the other hand, use ink on paper with the CMYK (Cyan, Magenta, Yellow, Key/Black) model. If you send an RGB file to a printer, the colors will often come out looking dull, muddy, and completely different from what you saw on screen.
Practical Pitfall: Many authors are heartbroken when the vibrant electric blue on their sci-fi cover turns into a drab, dark navy in print. Always design your print file in CMYK from the start, or convert it carefully, knowing that some bright screen colors simply can't be reproduced with ink.
Understanding Trim and Bleed
The second concept you must master is bleed. Commercial printers are incredible machines, but they aren't perfect. They can't print ink right to the absolute edge of a piece of paper. To get that professional, edge-to-edge color you see on books in a store, your design has to be slightly bigger than the final book.
- Trim Line: This is the physical dimension of your book (e.g., 6" x 9"). It's where the printer's cutter will slice your cover to its final size.
- Bleed Area: This is an extra safety margin, usually 0.125 inches, that extends beyond the trim line on all outer edges. Your background image or color must fill this area completely.
If your background stops exactly at the trim line, even a tiny, sub-millimeter shift during the cutting process will leave an unattractive white sliver on the edge of your finished book. By extending your design into the bleed area, you provide a margin for error, guaranteeing a clean, professional cut every time.
Calculating Your Print Cover Dimensions
When it comes to printing a physical book, there’s zero room for error in your cover dimensions. A tiny miscalculation can lead to a crooked spine, text getting chopped off, or an outright file rejection from the printer.
Getting it right comes down to three things: your trim size, your final page count, and the paper you choose.
This is directly tied to your interior book formatting. The way your book is laid out inside determines the final page count, which then dictates the spine width. Getting the spine width wrong is the single most common mistake indie authors make with print covers.
Key Factors That Define Your Template
Every choice you make for your physical book impacts the final template you'll need for your cover wrap.
- Trim Size: The final width and height of your book, such as 6" x 9" or 5" x 8". Your front cover must match these dimensions.
- Page Count: This is not your manuscript’s page count in Word. It's the page count of your final, fully formatted interior file. A lean 200-page book will have a much thinner spine than a 400-page epic.
- Paper Type: Print-on-demand services like Amazon KDP offer options like white and cream paper. Cream paper is slightly thicker than white paper, creating a wider spine even with an identical page count.
All these elements feed into the one measurement that causes the most headaches: your spine width. Do not guess or estimate it.
Using a Cover Calculator
The only surefire way to get your exact dimensions is by using the official cover calculator from your printer. If you're publishing with Amazon KDP, you’ll find this tool in your book setup dashboard.
You will plug in your book's details: binding type (paperback or hardcover), interior type (black & white or color), paper type (cream or white), trim size, and your final page count. The calculator will then generate a custom template, usually as a PDF and a PNG, that shows every line and margin you need to follow.
Decision Point: Do not design the cover before the manuscript has been 100% finalized, edited, and formatted. If your page count changes by even two pages, your spine width will change. This means your entire cover file is now wrong and needs to be redone. Always lock in your interior file first.
Interpreting Your KDP Template
Once you download that template, you'll see a diagram with colored lines and shaded areas. Here’s a breakdown of what you're looking at:
- Overall Dimensions: The total size of the flat file, from the far-left edge of the back cover bleed to the far-right edge of the front cover bleed.
- Spine: The shaded area in the middle. This is the only place your spine text and any spine graphics should go.
- Bleed Line (Outer Red/Pink Line): Your background image or color must extend all the way to this outer edge.
- Trim Line (Black Line): This is where the machine will slice your cover to its final trim size.
- Safe Zone (Inner White Area): All important text (like your title or author name) and logos must stay inside this box to avoid being trimmed off.
- Barcode Area: The box on the back cover is a placeholder where KDP will automatically place your ISBN barcode. Do not put anything important there—let your background art run through it.
For a detailed breakdown of all the numbers and requirements, be sure to check our complete guide on Amazon book cover dimensions.
Expanding Your Design Into a Full Print Wrap
You have your front cover design. Now you need to turn that single image into a full, print-ready wraparound cover.
This involves assembling your design—whether from an AI tool or a designer—onto the official template from KDP or your chosen printer. The end goal is a single, seamless PDF that includes your front cover, spine, and back cover.
This isn't just about placing three images together. A great print cover feels like a single, cohesive piece of art. If you've designed some stunning thriller book covers, that moody, atmospheric feel needs to flow uninterrupted across the spine and onto the back.
Assembling Your Back Cover and Spine
Think of your back cover as prime real estate. For a reader holding your book in a store, this is your final sales pitch.
At a minimum, your back cover needs:
- A Compelling Blurb: A short, hook-driven summary that grabs the reader.
- A Brief Author Bio: A quick paragraph to help readers connect with you.
- The Barcode Zone: On the KDP template, leave this box empty. Your background art must flow underneath it, but KDP will place the ISBN barcode there automatically. Do not put any other text or logos in that box.
The spine, while small, is arguably just as critical. It’s what sells your book when it's on a shelf. The spine text must be perfectly centered and oriented to read from top to bottom. A good rule of thumb: when the book is lying face-up, the spine text should be right-side up.
Common Pitfall: One of the most frequent reasons KDP rejects print files is because text touches or crosses the spine fold lines. Use your design software’s guides and zoom in to ensure you leave a small but safe gap between your spine text and the edges of the spine area.
As the chart below shows, your spine width isn’t a random guess—it’s a precise calculation based on your book’s trim size and final page count.
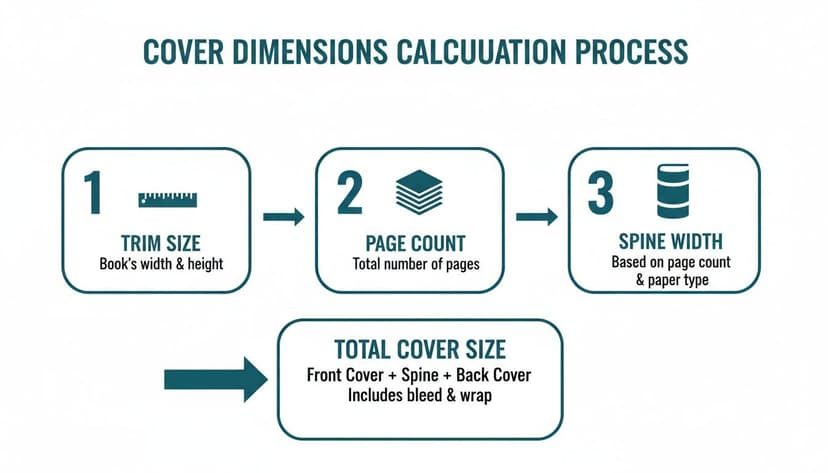
This process makes it clear: get your page count and paper type locked in before you finalize your cover file.
Extending Your Art for a Seamless Bleed
Here it is: the most critical step for a professional-looking paper book cover. You absolutely must handle the bleed correctly.
Your background artwork—whether it’s a solid color, a texture, or a full illustration—has to extend across the entire template, all the way to the outer "bleed" line.
This is non-negotiable. If your art stops at the black trim line, you are practically guaranteed to see thin white slivers along the edges of your cover after it’s cut.
Common Pitfalls to Avoid:
- Forgetting to extend the art: Don't just place your front cover image and leave the rest of the template white.
- Stretching your front cover: Simply grabbing the corner of your front cover and stretching it to fill the entire wrap will distort the image and look unprofessional.
- Mismatched elements: Ensure any textures, gradients, or patterns on the back and spine are a perfect continuation of the front.
Treat the entire wrap as one giant canvas. Use your design software’s clone stamp, content-aware fill, or pattern tools to organically continue the background. This ensures that when the cover is printed and folded, the design flows beautifully from front to back.
Before you hit that upload button, run your file through this final checklist. It can save you from a frustrating rejection notice from KDP.
Print Cover File Requirements Checklist
Use this checklist to confirm your file meets the essential specifications for KDP and other print-on-demand services before you upload.
| Specification | Requirement | Why It Matters |
|---|---|---|
| File Format | Single PDF | KDP and most printers require a single, flattened PDF file that contains the front, spine, and back cover. |
| Color Profile | CMYK | Print uses CMYK (Cyan, Magenta, Yellow, Black) ink. Submitting an RGB file can cause major color shifts. |
| Resolution | 300 DPI | This is the industry standard for print. Anything lower will result in blurry, pixelated images and text. |
| Bleed | Art extends 0.125 inches past the trim line | Ensures there are no white edges on your final cover after the printer trims the paper. |
| Barcode Area | Kept clear of text and logos | KDP automatically places the ISBN barcode here. Any elements you place will be covered up or cause an error. |
| Text Safety | All text is within the safety margins | Keeps important text from being accidentally trimmed off or getting lost in the spine's fold. |
Spending a few extra minutes to double-check these specs is always worth it. It’s the final step to ensuring the book in your hands looks just as good as the one you imagined.
Applying Design Principles for Physical Covers
Designing a great paper book cover is a balancing act. It has to succeed in two totally different arenas: first as a tiny thumbnail on an online store, and second as a physical object in a reader’s hands.
A design that looks incredible on a large monitor can become an unrecognizable blur on a search results page. On the flip side, a design optimized only for a small screen might feel disappointingly flat or generic once printed. Your cover must work for both contexts.
Designing for Digital and Physical Impact
Take a look at any bestseller list and you’ll see this dual-purpose aesthetic. High-contrast images and big, bold typography are a survival strategy. These design choices cut through the digital noise and stay legible even after a retailer's compression algorithms have their way with them.
Strong color and contrast do the heavy lifting online. For example, some of the most effective book cover design trends for 2026 focus on bold, simple iconography that is instantly recognizable at a small scale. This logic applies to every genre. Our best book cover design tips always emphasize that a fantasy cover needs a single, powerful element—like an iconic symbol or a striking character silhouette—that pops even at a tiny size.
Adding Tactile Appeal for Print
But a paperback is more than just a marketing tool; it’s a physical experience. Once the bold design has secured the sale, subtle details justify the reader’s purchase and make the book feel like a premium object.
Consider adding touches that are almost invisible online but add value up close:
- Subtle Textures: A faint linen or worn paper texture layered into the background.
- Fine Details: Delicate filigree or line art on a fantasy cover’s border.
- Layered Graphics: Barely-visible symbols or patterns that create depth when you hold the book.
These elements are a reward to the reader. A historical fiction cover might have a ghosted, aged map in the background that you only notice when you’re holding it. It makes the book feel like a crafted artifact, not just a printed file.
Decision Point: The bold design gets the click, but the subtle details make the reader fall in love with the book as an object. It’s a one-two punch that combines effective marketing with a satisfying reader experience.
Finding that balance between bold and subtle is key. An AI tool can be helpful for this, allowing you to quickly generate and compare variations to see how different levels of detail and contrast look. This helps you find a mix of digital pop and physical craftsmanship without burning weeks on endless design revisions.
Finalizing and Troubleshooting Your Print-Ready File
You’ve designed the cover. Now for the most nerve-wracking part: getting it ready for the printer. This is where you turn your design file into a single, flawless PDF that meets your printer's exacting standards.
Your export settings are everything. You must export as a PDF, ensure the resolution is a sharp 300 DPI (dots per inch), and confirm the color profile is CMYK, not RGB. Most design programs also let you "flatten" the PDF, which locks all your fonts and images into place so nothing shifts or breaks when the printer opens it.
Navigating Common KDP Rejection Issues
Getting a rejection notice from Amazon KDP is frustrating, but it happens. Don't panic. The problems are usually minor and easy to fix once you know what to look for.
Here are the most frequent culprits:
- Incorrect Spine Calculation: If your spine text looks skewed or wraps onto the front cover, your spine width was almost certainly based on an old page count. Always finalize your interior manuscript before you calculate your cover dimensions.
- Text in the Bleed or Safe Zone: KDP will instantly reject a file if any part of your title, author name, or blurb is outside the safe area and touching the bleed line or the fold lines near the spine. Zoom in and make sure you’ve left a safe margin around everything.
- Low-Resolution Graphics: If any image, logo, or texture on your cover is below 300 DPI, KDP’s automated check will flag it. Start with high-quality source files from the beginning to avoid this.
For a deeper dive, you can learn more about prepping your files with our guide on printable book covers, which has more tips for sidestepping these exact issues.
The Ultimate Quality Check: Physical Proofs
AI tools can make the initial design phase more efficient, but a physical book lives and dies by human refinement. As AI-generated art becomes more common, your ability to blend that technology with thoughtful design choices is what will set your book apart. Top designers are already exploring how to mix AI with a human touch, a trend you can see in reports from places like Spine Magazine.
No matter how perfect your file looks on screen, you absolutely must order a physical proof copy. This is the single best way to catch problems before your book goes live.
A digital preview on your monitor can’t replicate the real thing. A physical proof lets you see how your colors actually print in CMYK, feel the paper stock, and check every alignment with your own eyes. It’s your final chance to spot a typo or slight misalignment, saving you from bad reviews and the hassle of pulling your book from sale to fix a mistake.
Common Questions About Paper Book Covers
Even with a step-by-step guide, a few questions always pop up when authors are wrestling with their first paper book cover. Let's address the most common ones.
What Is the Difference Between Paperback and Hardcover Templates?
Each format requires a completely different file, and they are not interchangeable.
-
Paperback: This is the most straightforward template. It’s a single, flat file combining the front cover, back cover, and spine.
-
Hardcover (Case Wrap): The template for a case wrap is much larger than the finished book. It includes significant extra space on all four sides. This extra artwork is what gets folded and glued around the thick greyboard that gives the book its rigid structure. The template will also have designated hinge areas for where the cover bends.
-
Dust Jacket: This is the largest template of all. It’s essentially the hardcover design plus two wide flaps that fold inside the front and back covers. That extra real estate is perfect for your author bio, reviews, or a list of other books in the series.
Can I Use My Ebook Cover Design for My Paperback?
You can use the front cover artwork, but the file itself must be completely rebuilt for print.
An ebook cover is a simple, screen-optimized RGB image (usually a JPEG). A physical book cover is a complex, print-ready CMYK PDF that includes the back cover and a spine measured down to a fraction of a millimeter.
You must adapt your design onto a specific print template from your printer, like KDP or IngramSpark. Think of it less as a "conversion" and more as a new construction project that uses your original art as the foundation. To see this in action, check out how the front designs on these romance book covers are extended across the spine and back to create a cohesive package.
Key Takeaway: Your ebook cover is the ingredient for your front cover, not the final print file. You still have to build the full wraparound cover from scratch using a proper template.
Why Is Bleed So Important for Paper Covers?
Bleed is a small safety margin of your background art—usually 0.125 inches—that extends past where the book will actually be cut. Why? Because commercial paper trimmers are incredibly precise, but they aren't perfect. Tiny mechanical shifts are part of the process.
If you don't include bleed, even a sub-millimeter shift during trimming can leave a glaring white sliver along the edge of your cover. It's a dead giveaway of an amateur job. Bleed guarantees that your cover's color or image goes cleanly to the very edge.
How Do I Calculate My Spine Width Correctly?
Your spine width is a direct result of your final page count and the type of paper you choose (cream paper is typically thicker than white paper). Never guess or estimate this number.
The only way to get it right is by using the official cover calculator provided by your printer. You’ll enter your final book details, and the tool will generate a custom template with the exact spine width already calculated for you.
Make sure your interior manuscript is 100% final before you generate your cover template. If your page count changes by even a single page, you'll have to start your cover all over again.
Relevant Free Tools
Keep going with the right generator
These tools match the topic of this article and give readers a direct next step.
Ready to Create Your Own Book Cover?
Turn your story into a visual masterpiece. Fill in the details below to start generating professional covers instantly.